


How to harvest marijuana
Marijuana Harvest Stage
By Caroline | March 31st, 2021
It's that eagerly anticipated moment that every grower looks forward to: Harvesting time!
In this article, we will discuss how to harvest marijuana the right way and at the right time so you can enjoy the best buds you've ever smoked!
Key elements to perfect harvesting:
- Prepare thoroughly for harvesting.
- Cut when the trichomes are milky.
- Cut large plants into small V-shaped branches.
- Store in glass jars.
- Cure for three months.
Are you ready to learn how to obtain the perfect harvest? Let's dive right in!

What is the marijuana harvest stage?
The marijuana harvest stage is the time when all your hard labor comes to fruition.
Generally speaking, the marijuana harvest stage is the final phase of the six-part growing process, consisting of:
- Seed selection.
- Germination.
- Seedling.
- Vegetative.
- Flowering.
- Harvest.
(To learn more about these growing periods, check out our Stages of Marijuana Growth article).
The first step of how to harvest marijuana means determining when the trichomes are in the perfect state for drying, cutting, and storing. This is a skill that I will now happily share with you.
When to harvest marijuana?
Knowing when to harvest your marijuana crop doesn't solely come down to a timeframe.
Seedbanks and suppliers often indicate a suggested harvest time and many novice growers stick religiously to these recommendations.
Generally speaking, experts advise that Indica and Sativa strains are ready after 8 and 10 weeks of flowering respectively.
However, it is not always that black and white.
Individual (environmental) conditions may vary and affect how quickly your marijuana reaches maturity.
To determine when your crop is actually ready to harvest, here are some important indicators to keep an eye on.
Let's start with the visible signs your plants are ready to harvest:
Leaves
This is one of the most obvious indicators and you don’t have to be a professional botanist to notice the change.
If the fan leaves turn yellow during the vegetative stage it's a bad sign that is known as chlorosis. It suggests that your plant is lacking in some nutrients. Naturally, this would need addressing by determining the deficiencies and following a remedial plan.
However, during the flowering phase, yellow fan leaves are a sign that they’re beginning to die. This is because the plant is focusing all its resources on the buds.
Take this as a cue that the buds are reaching maturity and becoming ready to harvest.
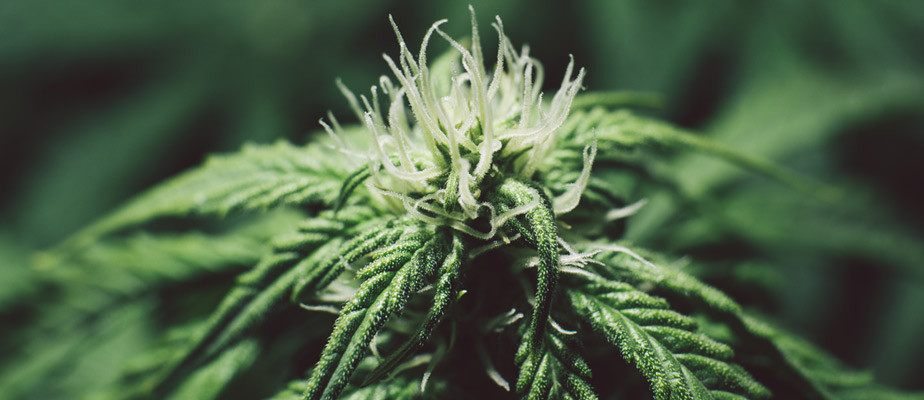
Pistils
Ok, a quick marijuana plant structure 101, or phytomorphology if you prefer.
Pistils are the reproductive organs (well in female plants anyways) that contain the ovaries where seeds will develop if fertilized.
You can easily identify them on cannabis plants sprouting from the calyx (part of the bud) as hair-like extrusions.
Early in the flowering stage, these pistils are white. However, as the plant matures, they change to orange, brown, and red colors.
If they’re white, be patient and allow them a little more time.
Ideally, I would advise holding off harvesting until around 50% of the pistils have turned to a darker hue.
Trichomes
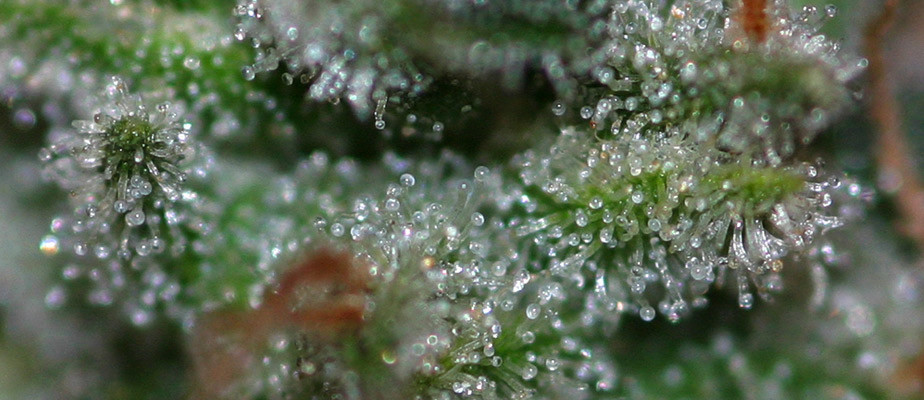
Looking somewhat similar to mini-mushrooms, trichomes are hard to spot unless you are using a magnifier.
These structures, sometimes known as the resin glands, form the ‘frosting’ on your leaves and buds, creating a sticky surface.
Many seasoned breeders consider the trichomes to be the most accurate test of harvest readiness.
In the early stages of growth, they appear clear, almost glass-like. As they age, they begin to cloud. It’s when they hit a milky hue that it’s time to harvest. Instead of glass-like, they seem more like plastic.
Indicated flowering time
As mentioned earlier, seeds and seedlings often come with advice on flowering and harvest time. However, it can be inaccurate and doesn’t compare to visual methods.
Instead, I would suggest using the indicated flowering details as a macro-time plan, giving you an idea of when you should be considering harvesting. This way, you can ensure that you’re not on a three-week beach vacation when your plants are ready to harvest.
Timing your harvest for different effects
As previously mentioned; the correct time to whip out your cutting tools isn’t just based on plant maturity. Additionally, we would like to look at how to know when the buds are ready to deliver the effects you desire.
Pistils
Trim when around 60-70% have become dark for maximum THC (tetrahydrocannabinol) levels.
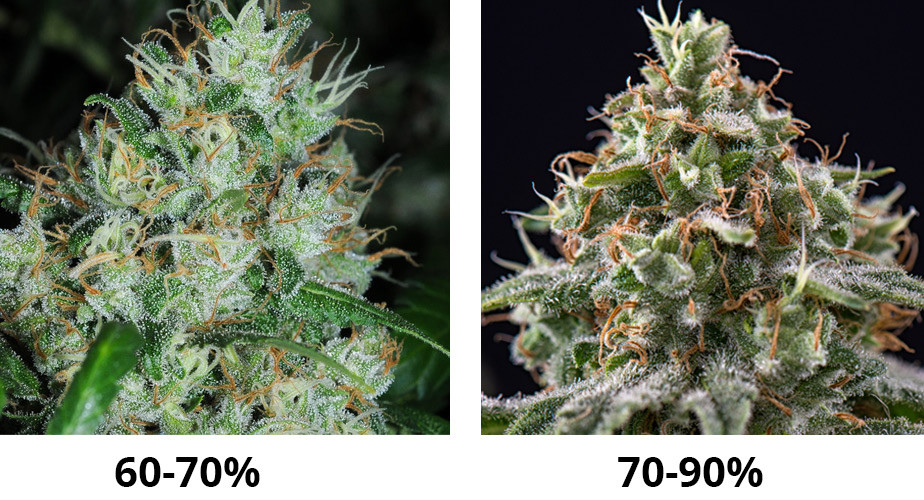
However, if you’re chasing a more physical and stoned high, aim for 70-90%. At this level, the plant has converted much of the THC into CBN (cannabinol).
Trichomes
Using the more exact method of trichome examination will deliver more specific returns:
- Early harvest - when the trichomes are still transparent, this provides an energetic high.
- Standard harvest - cloudy trichomes deliver an intense high with an underlying stoned feeling.
- Late harvest - amber trichomes produce a seriously all-over physically stoned effect.
Using a magnifier is advised since trichomes are barely visible to the naked eye.
When to harvest indoors vs outdoors
The crucial signs as mentioned previously equally apply to indoor plants as well as outdoor plants.
However, when it comes to the growing season and with that, the time of the harvest itself, there are some key differences.
When growing outside, cannabis is dependent upon the photoperiod. This means it transitions from a vegetative to a flowering phase when the days begin to shorten and the nights become longer.
This means that your geographical location will have a pronounced effect on harvesting time.
For example, on the US West Coast, if you’re growing marijuana in northern California, you have a long outdoor season. You can plant outside early and harvest late thanks to the region’s relatively warm climate.
Conversely, Washington State has a much shorter window. The plants need to be planted later in the season until there’s insufficient sunlight. Subsequently, you will also have to harvest earlier before the days get shorter and the temperature drops. The primary reason for this is avoiding the cold, which can make buds moldy and wet.
Depending on your locality growing outside means planting around mid-April to the end of June. Harvesting generally occurs from mid-September to the end of October.
What to do before harvesting your weed
Now that we understand the basics about how to harvest marijuana, it's time for that final, very important, step.
Adequate preparation saves time and ensures you reap the optimum product.
A brief timescale:
- 14 days before harvesting: Stop any spraying that you’ve been doing. This prevents any residue on the buds and lowers the chance of mold growth.
- 10 days before: Remove the oldest (usually the lowest on the plant) and most yellow leaves, since they are using more energy than they’re providing to the buds (don’t go higher than the lowest 25%).
- 7 days before: Flush the plants. Water them with solely distilled or RO (reverse osmosis) water, this cleans the plant of any residual fertilizers, which can make buds harsh and unpleasant.
It’s equally important that you have everything ready for harvest day itself.
Ensure you have the following items readily available:
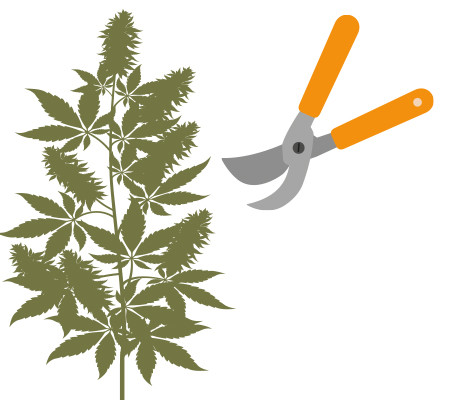
- Cutting tools such as pruning shears
- Scissors for trimming
- Magnifier (microscope, macro digital camera, or jewelers loupe)
- Drying room/area
- Glass jars
- Humidity equipment
- Disposable gloves (to protect your hands from the sticky resin)
How to harvest marijuana step by step
You've made all the necessary arrangements and taken the required precautions. Now it's go time!
To make how to harvest marijuana as productive and straightforward as possible, here's a 6 step plan to bring this project to a successful conclusion.
Step 1: Cut the plant
First things first: put on your gloves!
Not only will the sticky THC adhere to anything and everything but you also don’t want to contaminate your plant.
Using your cutting tool, carefully cut the entire plant away from the root ball.
However, if your plants are too substantial for just one cut, you might want to consider a different approach.
Remove the heavier and larger branches of your marijuana plant first. Ensure that you leave a few stems connected to these branches, they create nice V-shapes, which makes hanging much simpler.
Step 2: Remove the fan leaves
The fan leaf is the quintessential marijuana symbol: a large, green, and spiky leaf that became a cultural icon.
During the growing process, these leaves are the energy providers for your plant, nourishing its growth through photosynthesis.
However, once you’ve cut it, it won't grow anymore, so they have no purpose. (Do not toss them out though! You can still use them to make edibles).
Furthermore, they store vital moisture.
When the plant senses it’s not receiving any more water, it redirects the liquid content from any remaining fan leaves to the all-important buds. This is because these buds provide the seeds for future plants.
You need to avoid this since it extends the drying process time and may lead to mold growth.
By using your cutting tool or large scissors, cut off all the fan leaves (including the leafstalks).
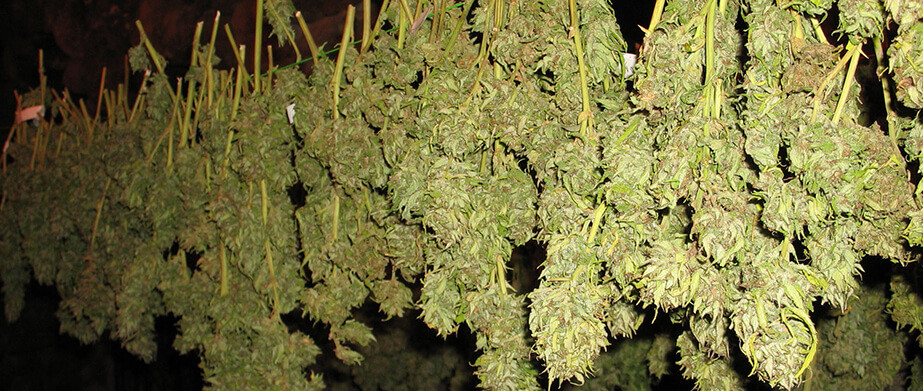
Step 3: Dry your marijuana plants
Drying is vital when comprehending how to harvest marijuana effectively.
Your buds need to be mostly dry before storage. Placing them in your glass jars or ziplock bags, while still containing moisture, could promote mold growth and subsequently, ruining your crop.
Secondly, the drying process increases the potency, flavor, and character of your marijuana.
Remember, it's a marathon, not a sprint.
Under no circumstances whack up the heating and try to dry your buds as quickly as possible. It will improve the bud quality if this happens gradually.
Ideally, you want a temperature of around 21℃ / 70°F with a humidity of 50%.
When you cut your plant, it doesn’t die immediately.
This only occurs when its water pressure is too low for vascular transport. Hence, you need to dry it slowly since this preserves more of the trichomes and allows the THC potency to elevate.
The THC changes from an unappealing acidic and non-psychoactive chemical into a neutral pH, psychoactive compound. This is why extremely fresh marijuana tends to be weaker than dried buds.
Furthermore, if you try to speed up this process, it can lead to the trapping of nitrates and starches causing a bitter taste and making buds burn unevenly.
There are three conventional methods of drying marijuana:
- Trays: there are special racks available consisting of numerous horizontal trays, promoting highly efficient air circulation. However, drying weed in this manner may give your buds a seriously noticeable flat underside.
- Hanging: suspend the v-shaped branches (or the whole plant if small) over a string, wire or a clothes rack. Just ensure you suspend the plant fully in the air, it doesn’t touch the floor and the plants aren’t packed too tightly together, which can prevent drying.
- Ventilation: you can add a fan to either of the above methods to promote air circulation. However, ensure it’s on a low setting. Too high and the buds may dry out too quickly and damage could occur through plants brushing against each other.
How long do they take to dry?
Depending upon the heat, humidity, and residual moisture in the marijuana, your plants should dry within five to nine days.
If you’re in areas of extreme humidity, a heater can be used to evaporate some of the water. Conversely, if the air moisture content is lower than 50%, consider using a humidifier.
How do you know they are dry enough?
Bend both the small and larger twigs.
The smaller types should snap, while the larger ones should break—but not snap. If the twigs remain pliable and bend easily—they need more drying time.
Step 4: Remove buds from stems
You’ve grown, cut, and dried your marijuana. Now it’s time for the finishing touch: the manicure.
Aesthetically, a neatly trimmed bud is pleasing to the eye and typical of what you see online or in publications.
Furthermore, removing the sugar leaves exposes the higher THC-containing trichomes. This provides a more satisfying high and less harsh smoke.
Here’s the method:
- Cut the buds from the branch while leaving sufficient stem for you to hold.
- Hold this cut stem in your non-dominant hand.
- Snip the buds from the branches and store them in a large tray. This process is known as ‘bucking down.’
- Take the cut bud and commence the manicure. Cut off the crow’s feet. These are the tiny branches that extrude from the bottom of the nugget.
- Remove any extraneous matter, including any sugar leaves. Don’t throw them away! They contain THC and you can use them for making hash or weed oil.
- Place the sculpted bud into a glass jar.
During this process, continually rotate the bud as you snip to ensure an even appearance. If your scissors become covered in resin, swap or clean.
Step 5: Store marijuana in glass jars
Now that you know how to harvest marijuana let's move on to storage. One of the most commonly used options for storage is glass jars.
Why glass jars?
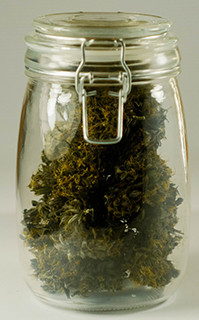
The reason that this type of storage is so popular, especially the mason jar variety, is because there’s little chance of cross-contamination from the container.
Heavily rubberized or plastic containers can taint your marijuana which ultimately results in giving it both an unpleasant odor and taste.
However, there are some requirements your glass jar needs to meet. The most important being that it needs to be airtight.
This ensures that the distinctive scent and flavor are preserved, leading to a seriously satisfying smoke. Furthermore, make sure your jars are three-quarters full in order to prevent excess air content.
Many breeders opt for opaque glass or store clear jars in a dark location. This is because research demonstrates that light degrades marijuana’s quality.
Are there alternatives?
You’ve probably seen people storing their produce in airtight ziplock bags.
There are some benefits over the glass in a sense that they:
- Are cheaper
- Take up less room for storage
- Weigh less (which can be useful if kept on shelves)
- Convenient for transportation
However, these benefits are purely practical. Quality-wise, it’s preferable to store in glass.
Plastic ziplock bags can leak BPA (bisphenol A) and are less effective at keeping out air. Not to mention they build up static, causing those valuable trichomes to stick to the sides.
Some aficionados swear that keeping marijuana in the freezer is the best option. However, extremely low temperatures may cause trichomes to turn brittle and snap off and thus reducing the potency of the buds.
Step 6: Curing
Once you’ve completed the drying process, you’re finally able to sample your first bud from this crop.
However, the longest shelf-life, and the most intense flavor, only develop after some perfect curing.
Any remaining moisture is ‘sweated’ out, reducing the chance of future degradation and maximizing taste.
Here’s the process:
- Seal your buds in airtight, glass containers
- Store in a cool dark place
- Take off the lid daily and replace it after 15 minutes. This releases excess moisture through a process known as ‘burping’
- After three weeks, ‘burp’ your marijuana just once a week
- Continue this process until the marijuana has remained in the jars for three months
- Sit back, and enjoy the pure bliss of smoking your homegrown bud
Final words of advice on how to harvest marijuana
Growing your own marijuana means you can nurture the most phenomenal crop and not just the regular product you can buy from a dispensary.
Knowing when and how to harvest marijuana can make all the difference between an average and a truly exceptional smoke.
So remember: Be patient, closely observe the visual signs of your plants (they will tell you when the time is ripe!) and, if necessary, be patient some more. Use the proper equipment, remove all excess matter and store those delicious freshly cut buds accordingly.
While the wait may seem excruciating at some times, I promise you your patience will be rewarded!
If you enjoyed this article, please give it a try! And make sure to share it with your friends so they too can get the very best out of their crop.
Happy harvesting!
Caroline
Educated by one of the best breeders in the Netherlands, I chose to combine my passion for writing with the fascinating world of cannabis cultivation. What are the best strains for which occasion, what are the effects, and how to use responsibly? Let me take you on a journey.