


Flowering stage:
what are the first signs and when they're ready to harvest?
By Stan | April 22nd, 2024
Today you’re going to learn ALL you need to know about the Flowering Stage.
In this guide you will learn:
- How to spot the first signs of the flowering stage
- Watering during the flowering stage
- What happens week-by-week
- When they are ready for harvest
- And more
Sounds good? Let’s do this!

What Is the Marijuana Flowering Stage?
Technically, the flowers of cannabis are reproductive organs, or the seed-bearing part of a plant. This doesn’t mean that the seed needs to spawn, but that this part of the plant is where something blooms.
In cannabis plants, the male produces seeds, and the female plants produce a bud. This bud is where you get the sweet, sticky resin that you’ll imbibe later on. So, while marijuana flowers may look different than other flowering plants, it’s just in appearance. A rose by any other name, indeed.
This stage is risky because a mistake during this time could lower your potential yield. The plants are less forgiving and more sensitive, so just like with your partner, pay more attention, and be extra attentive to their needs during this time.
What Are the First Signs of the Flowering Stage?
 If you prep seedlings that you intend to transplant to their final home to adulthood, the vegetative stage starts once you move them. This stage takes about four weeks, or 28 days.
The flowering stage lasts anywhere from 7–10 weeks, depending on the strain of the plant. At the basic level, sativas and indicas can mature on different schedules. Some sativas take longer than the 7 to 10-week range to reach harvest. Indicas will always take less time to flower than sativas.
The shift happens when your plant is getting more periods of darkness. For those growers that have planted their babies outside, this will happen with the seasonal cycle. Expect the switchover from vegetative to flowering stages to occur around the end of the summer.
You can be sure the flowering stage has started when pistils start to emerge from your plants.
Can You Trigger the Flowering Stage?
What really triggers the budding is the uninterrupted darkness. If any light penetrates this darkness, disrupting the overwhelming night, the plants won’t not bud. Even the light of the power-led on the fan, can ruin your plants. For outdoor growers, if you have a greenhouse, you can trigger this stage by covering the plants with tarps that keep any light out, even starlight.
If you’re an indoor grower, you will be deciding this transition yourself. You’ll be transitioning your plants when you switch your lighting schedule from an 18/6 schedule to 12 and 12. If you’re not sure what this is — 12 hours of light and 12 hours of uninterrupted dark. On the last day of the vegetative stage, create 24 hours of darkness between the switch.
Flowering Stage Tips
 The shift from the vegetative to the flowering stage will not only indicate a change in the behavior of your cannabis plants. Your behavior as a grower will change as well.
The new water, nutrient and temperature demands of your sexually maturing bushes (wink wink) will reflect the increase in size and energy needed to bloom:
- Water demands will rise in volume and frequency.
- Plants will absorb more phosphorus and potassium, but less nitrogen.
- Ideal temperatures for the flowering stage are around 20 °C (68 °F) during the darkness, and around 28 °C (82 °F) when the lights are on.
Best Nutrients for Flowering Stage
Once you’ve confirmed that your plants have shifted from the vegetative to the flowering stage, the nutrient needs of your bushes will shift as well. Your plants will require:
- More phosphorus.
- More potassium.
- Less nitrogen.
- Some calcium.
- Some magnesium.
During the first few weeks of the flowering stage, the plants need more nitrogen to stretch the stalk. As flowers start to appear, the nitrogen concentration in the nutrient feeding has peaked.
From here on out, the amount of nitrogen will decrease in relation to the combination of phosphorus and potassium. In the third week, the need for potassium increases, and calcium enters the mix. It’s important to boost both of these nutrients at this stage.
As your plants fatten, potassium and phosphorus should be increased weekly. These two nutrients together ensure balance. In the fourth week, you need to start introducing magnesium to the concoction.
From the 7th week onwards, decrease the nutrients gradually until they’re phased out completely. This is when the plants are flushed out.
Strain and variety will dictate nuances in the nutrient feeding cycle. If you’re growing more of a sativa, which generally has a longer flowering period, expect to increase the nutrients more gradually and keep them a bit lower. An indica will take up more nutrients in a shorter period. At the end of the harvest, you’ll find that even though the amounts distributed differently, indicas and sativas used the same overall amount of nutrients.

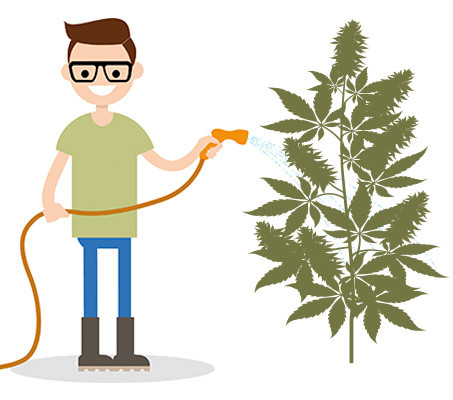
Watering During Flowering Stage
As you enter the flowering stage, the capacity of your plants to absorb water will grow. This means that you will have to step up the frequency of your watering schedule. More roots and a lot of complex growth in the buds mean your plants will be thirsty.
You will need to alternate nutrient feeding and watering. This helps keep the soil balanced and prevents chemicals from washing out of the soil due to overwatering.
Note: Water usage will vary from plant to plant. This given amount is only as an indication.
By putting your finger 5 cm (2 inches) in the soil every day, you can feel how dry the upper soil has become. If it feels dry, it’s time to water. The amount of water you have supplied, should be enough for about 3 days. Decrease the amount if your soil is still wet after 3 days, increase if it’s dry earlier than those 3 days.
In week 3 and 4 you’ll find out that your plants start to use more water. Increase the amount of water, so you still give enough water for about 3 days.
After week 4, stop increasing the amount of water. From here, try to water your plants every other day. Again, use your finger to be sure you're giving the right amount of water.
Be wary of excess water from humidity. This moisture can lead to mold, which would be devastating to your plants.
How to Flush Weed
Flushing your weed plants in the flowering stage of growth has an entirely different connotation and intention than memories of flushing a joint down the toilet so your parents don’t find out.
What Does It Mean to “Flush” Your Plants?
About two weeks prior to harvesting, you want to completely stop the flow of nutrients and chemicals that you fed your plant within previous weeks.
Instead of feeding nutrients to the plants, you’ll be giving them water only.
The residue of any salts or minerals will be “flushed” away from your plants’ soil, leaving behind only balanced, pure, healthy earth. If you don’t take this step, when you harvest the buds, they’ll likely be left with a slightly unpleasant taste and have harsh overtones in the smoke.
You’ll know your plants are ready for flushing when you are in the final stage, right before harvest, and the white pistils have nearly all darkened and curled in.
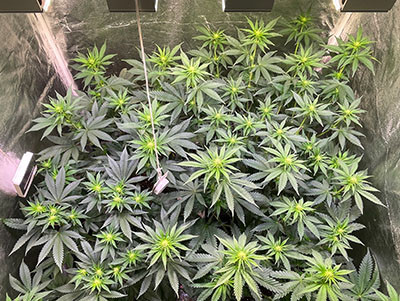
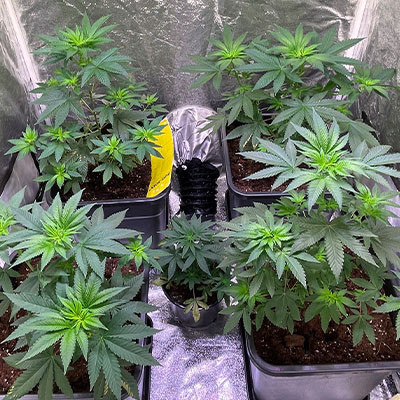
Week by Week Flowering Guide
This section explains what happens during the flowering stage from week to week. You can gauge your plants’ health and growth cycle by the milestones in this guide.
Week 1: It’s the Final Stretch
 This first week is also called the “stretch week.”
Think of this as the first stage of puberty, when young teen boys seem to grow a foot overnight or even as quickly as from one class to the next. The cannabis plants grow in the same manner during this time, stretching tall to reach their maximum height as they prepare to withstand the weight of a multitude of bloom. Sativas stretch further than indicas, in general.
Your plants will also be sprouting some new leafy green accouterments — stems and leaves. The increased surface area provided by the leaves gives extra help in turning the rays into enough food to support flowering.
During weeks 1–4, you’ll be training your plant to produce prodigious buds. By gently pushing the emerging leaves downward, you help them create a welcoming and wide space at the center for a flower to bloom. This technique is called “low stress training” and is intended to create a flat canopy for supporting blooms and capturing light.
During this time, the energy of the plant will be redirecting from growing big and tall into cultivating bushy and fragrant flowers. Just as the awkward teens bloom into swans, so too will these plants flower into beautiful blossoms after this transition week of stretch.
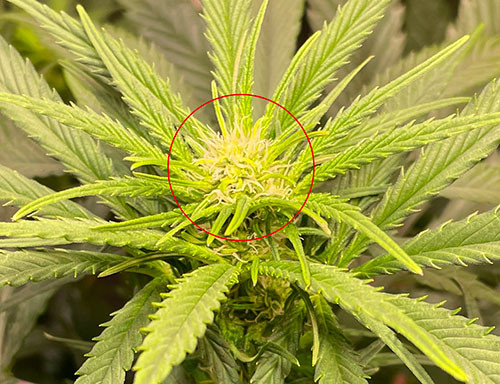
Week 2: Find out the Sex
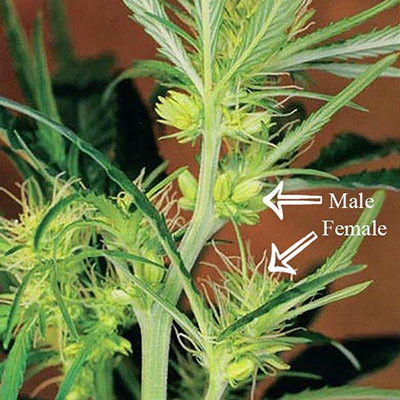 This week is the time to find out the sex of your plant as the signs of budding will begin to show. If you planted feminized seeds, this is when you learn the sex of your baby.
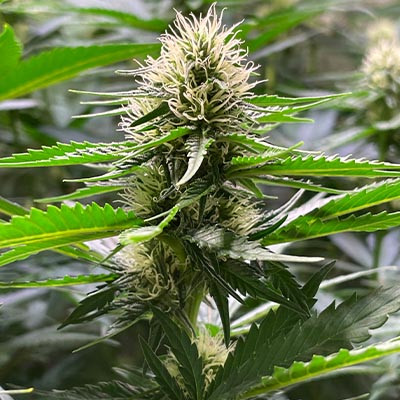
Male cannabis vegetation will start to grow small pollen sacs. Female plants will show tiny sprouts of white pistils.
Get to know the characteristics of pistils well, as your observation of them throughout this flowering stage will help you determine exactly what stage your particular plant is at. The pistils will be growing where the leaves meet the stem in week 2. The wispy hairs are the beginning; the promise of your flowering buds to come.
If you don’t intend to grow them, move the male vegetation as soon as you identify the gender. They won’t bud, and they may pollinate your female plants, causing them to grow seeds instead of flowers.
Week 3: The Beginning of the End
 Week 3 is the beginning of the end of the transition from the vegetative stage to flowering. During this time, you will start to notice that the main trunk of your plant has slowed its growth.
While your plants may still be stretching, that should come to an end sometime during this week when they reach their maximum height. They may be as much as quadruple the height they were at the end of the vegetative stage.
This week is critical in the feeding schedule. Your greenery will be gathering all of its strength and directing it to the buds. You may even start to see some budding, but there won’t be any smell at this point.
Inspect your green for any signs of discoloration on the leaves. You can expect that some leaves may fall off or turn a little yellow. It’s only natural when it happens to the ones not getting much sunlight. The bushes will self-prune and get rid of some leaves that aren’t providing any energy from photosynthesis. If your plant starts to lose leaves or discolor rapidly during this time, especially at the canopy, it’s not a good sign.
You may start to see a change in color on the tips of your leaves. This could be a symptom of nutrient burn. Nutrient burn occurs when you’re feeding your plant too much.
Don’t panic, as this isn’t a fatal sign. Simply decrease your nutrient feeds and keep an eye for spreading burn. Even plants with severe burn have been known to grow good bud, so triage the problem without panic.
Week 4: A Recognizable Smell
 Let there be buds! Now you should be seeing buds sprouting up all over your grow operation. They should have white pistils on them.
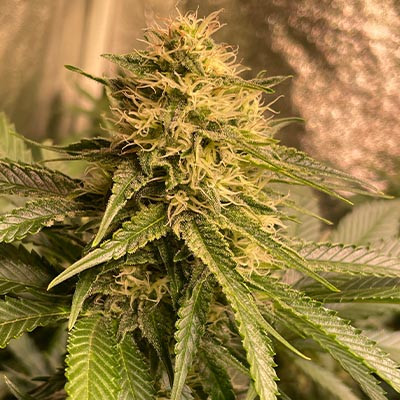
As some of your buds will get larger and fatter, especially towards the end of the week, expect to notice the arrival of week 4 in a big way — through the power of smell! As the buds expand and age, they develop trichomes, which put off the stinky, sticky smell we all know and love. Engage your sense of smell in this fourth week of flowering.
By week 4, you’ll no longer be training downwards, but instead potentially pushing your leaves up a bit to give extra structural support to the heavy germination in the center.
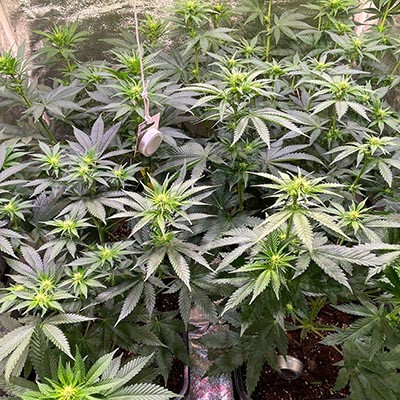
Week 5: A Thick Bush
 This is the week when your plants start to get fat. The buds should be prolifically growing as the stalk thickens to support the weight of such a heavy bush.
The stalk is not the only thing thickening in this week; the smell should be dense as well. You’ll need a strong vent system to circulate fresh air into your indoor grow operation.
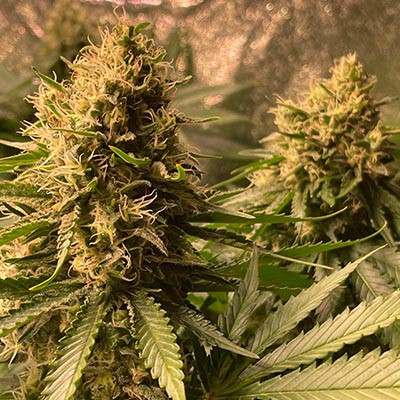
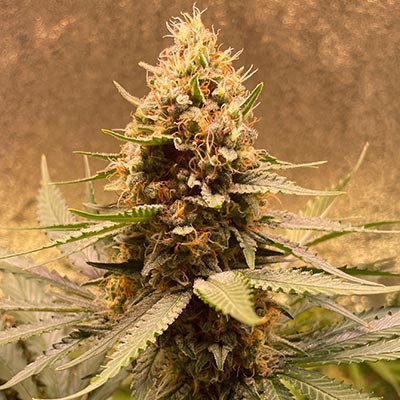
There should also be some expected color changes occurring; time to start paying attention again to the pistils. Some of them might be transitioning from their original whitish color to a brown or reddish amber color. The trichomes should also be shifting coloration, becoming more white and opaque as the week goes on.
Week 6: Leaf Week
 At the end of this week, your plants won’t be growing any more leaves. So, think of your leaves very strategically from here on out. You need to protect them to ensure survival from any accidental disease or negative impact on the vegetation.
You can engage in some tactical pruning to reveal and encourage more buds, but act with conservatism.
Most pistils will likely still be white at this stage. However, as this is the fattening stage, your buds should be thicker and thicker by the day.
Week 7: It’s All About the Buds
 Welcome to the last two weeks of growth! In this last phase, your plants will put maximum effort into thickening buds. As a consequence, some leaves at the base may experience yellowing. However, expect most of the plant to still be bushy and green now. Yellowing at the canopy may be due to light burn if you’re growing indoors.
Another sign of light burn is abnormal growth called foxtailing. A new bud emerging from the side of an old one is not a gift from the heavens that you’re meant to have the highest of yields. Instead, it’s actually a sign of heat stress.
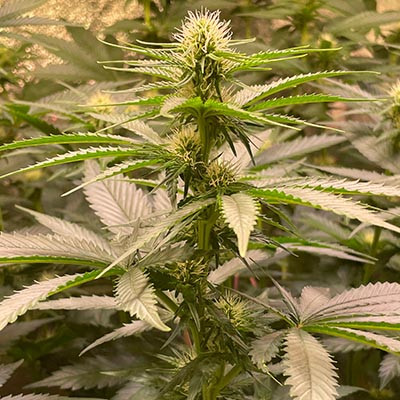
Week 8: Ready for Harvest
 Week 8 is the sign of the main event — the harvest season is afoot. Some strains develop faster than others, so drop all of your other commitments this week. Your plants deserve your undivided attention and should be your top priority.
At this point, your main job is attending your plants until they’re ready for harvest. This week is when you switch off the nutrient feed and start flushing your plants with nothing but water.
Leaves all over your plant may rapidly start yellowing. This is normal as long as it’s close to harvest, and the yellowing is not affecting your buds at all. Don’t try to solve this yellowing with nutrients. There’s nothing to solve at this point, and nutrients will only negatively affect your yield.
You’ll know to harvest when the trichomes on your plants have a cloudy white color or sometimes an amber coloration to them and the leaves of your plant are yellow.
Time to Reap the Reefer Reward
The flowering stage of marijuana growth is a challenging but rewarding phase of cannabis cultivation. During this stage, your plants bear fruit to the odorous and harmonious blooms that inspired you to take a chance on growing marijuana in the first place.
Make sure to pay close attention to your plants’ health, especially budding irregularities and any changes to leaves during this time. If you can dedicate the observational energy to these details, you’re sure to reap a bountiful harvest of quality bud to enjoy.
Stan
The effectiveness of THC Oil reintroduced me to the world marijuana. It’s amazing how this plant allows you to take the matters into your own hands. Growing this powerful plant at home truly gives me a self-supporting feeling. I even developed a green thumb.